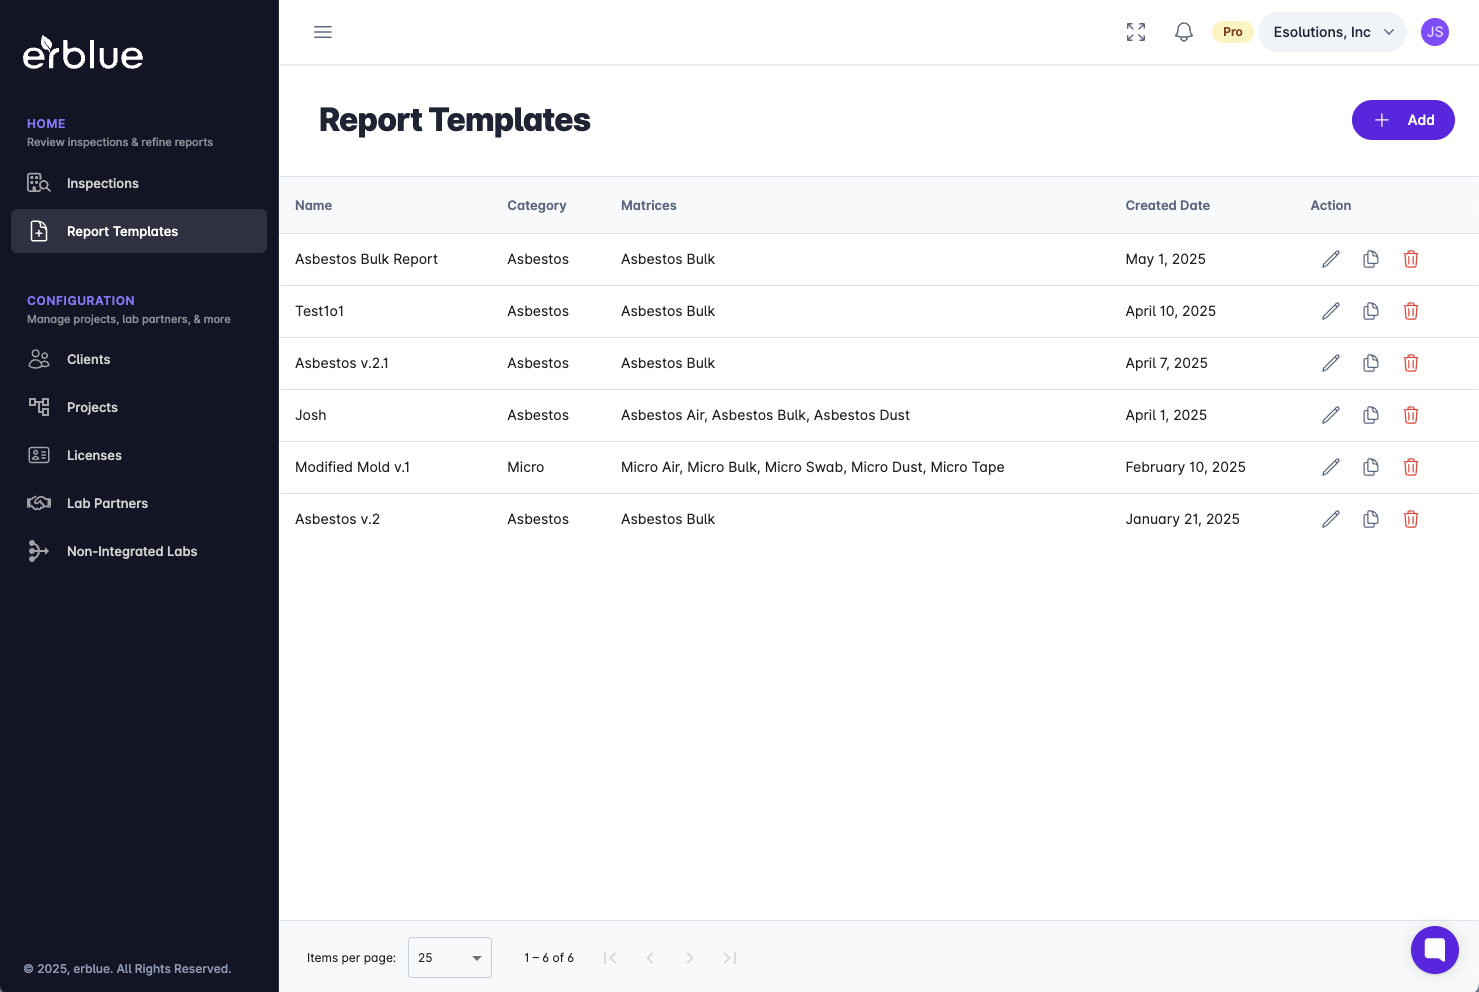
If you click on Report Templates in the main navigation menu, you will see the report templates listing page. From this page, you will see all of the available report templates for your account. You will notice, under the action column, you have the ability to edit, copy, and remove templates.
In the upper right corner there is a + Add button. Clicking this button starts the process of creating a new report template.
When starting a new template you have three choices:
Starting from a blank template
Importing an existing word template
Cloning an existing erblue report template.
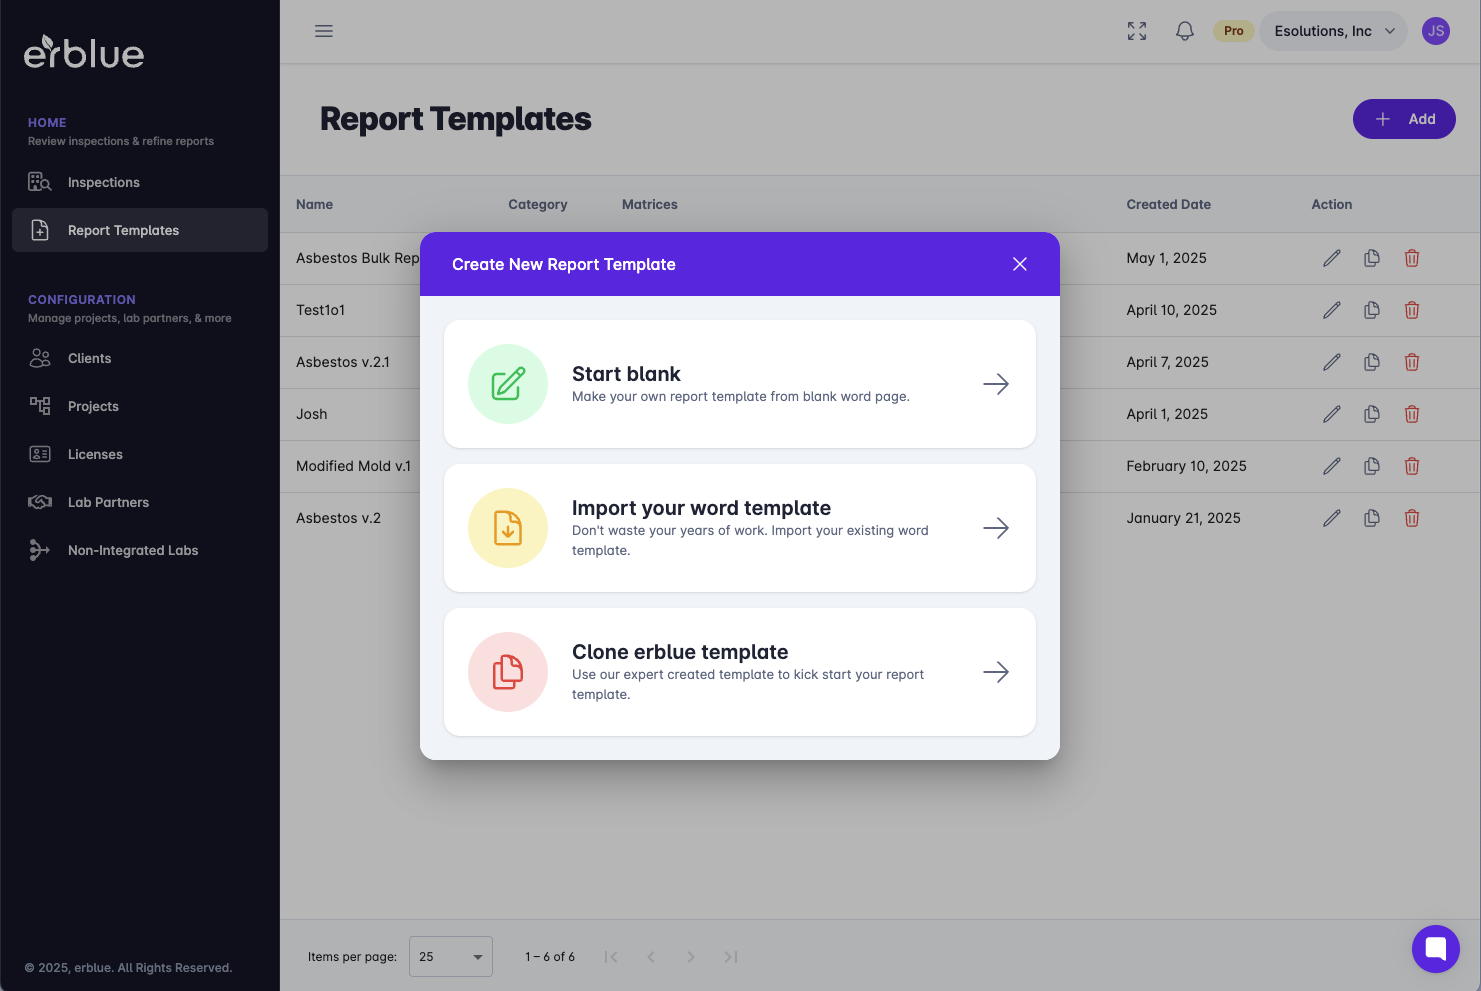
For instructional purposes, we will use the Clone erblue template. However, the principles of editing a template are the same regardless of the one you choose.
First you need to name the report template. Then you need to pick the category that the report template pertains to. The category choices are:
Asbestos Bulk
Asbestos Non-Bulk
Lead
Micro
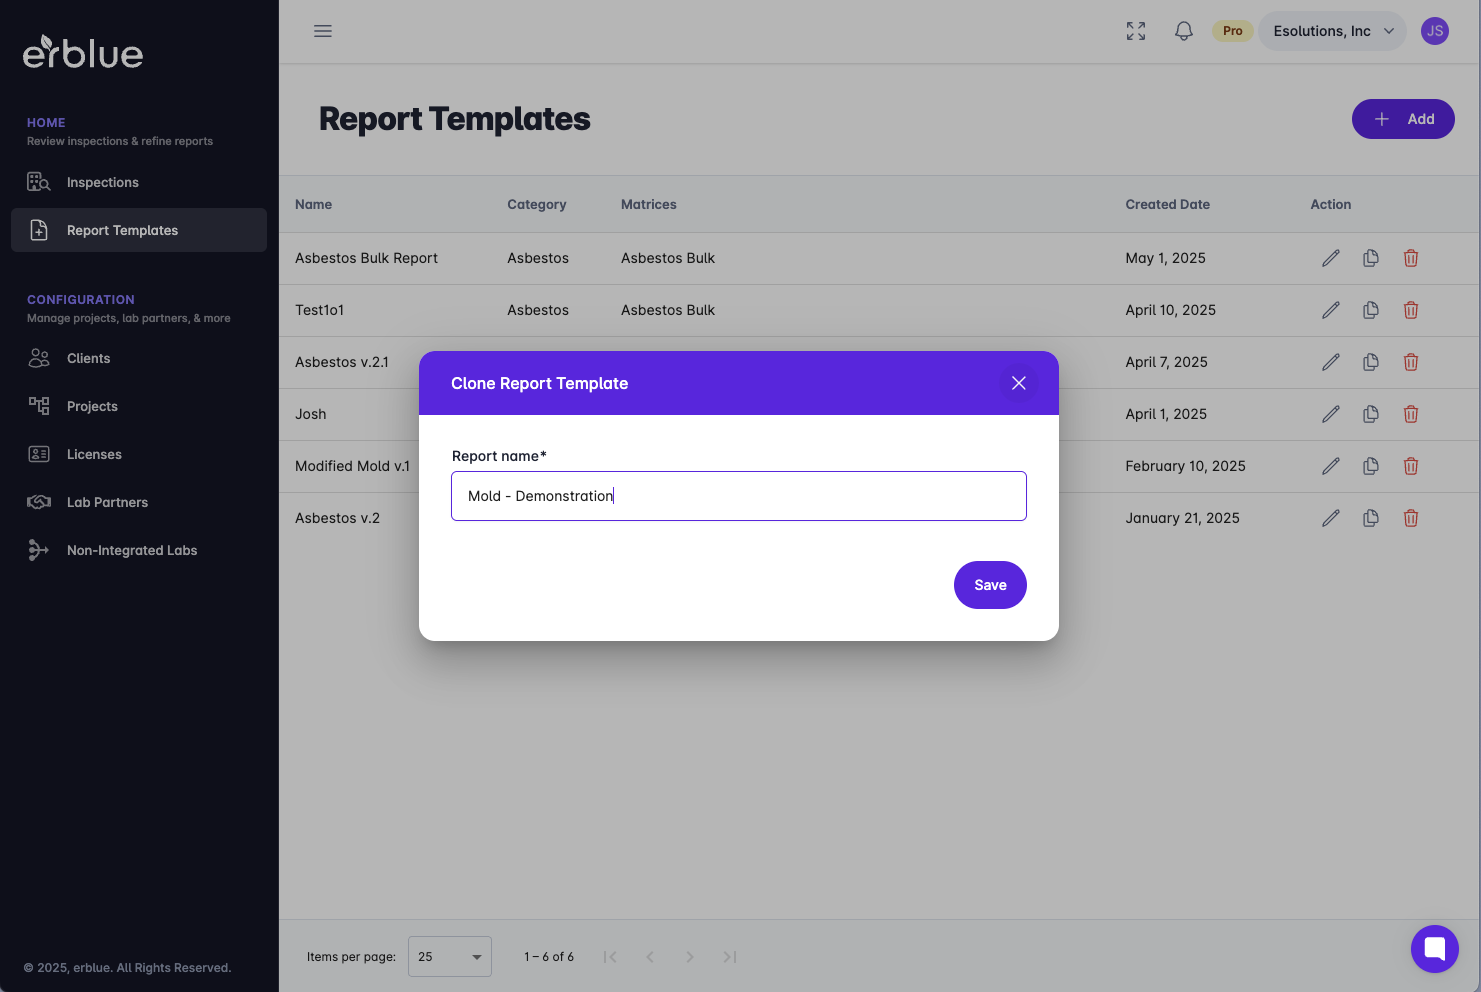
Next you would pick the Matrix or Matrices that the report template covers. For instance, if you perform mold inspections, you may do air sampling (spore trap) and swabs. In this case, you would select category Micro and matrices Air and Swab.
Once this step is completed you would typically click the import button.
The report template editor features an interface similar to Microsoft Word.
At the top of the editor, you'll find document controls.
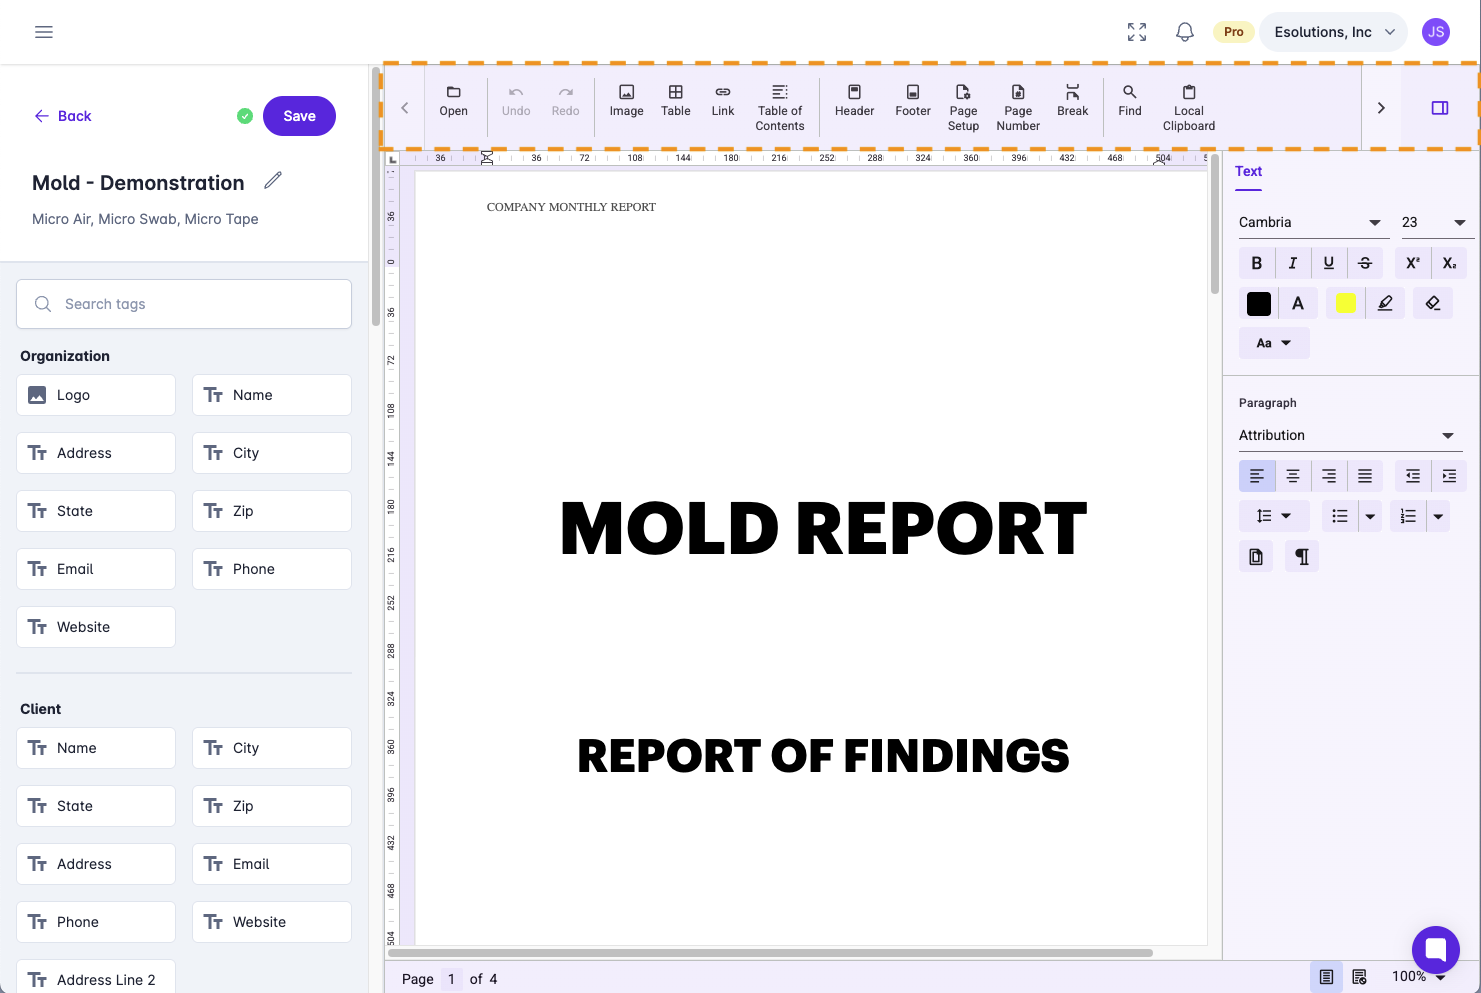
Property controls are located on the right side of the screen.
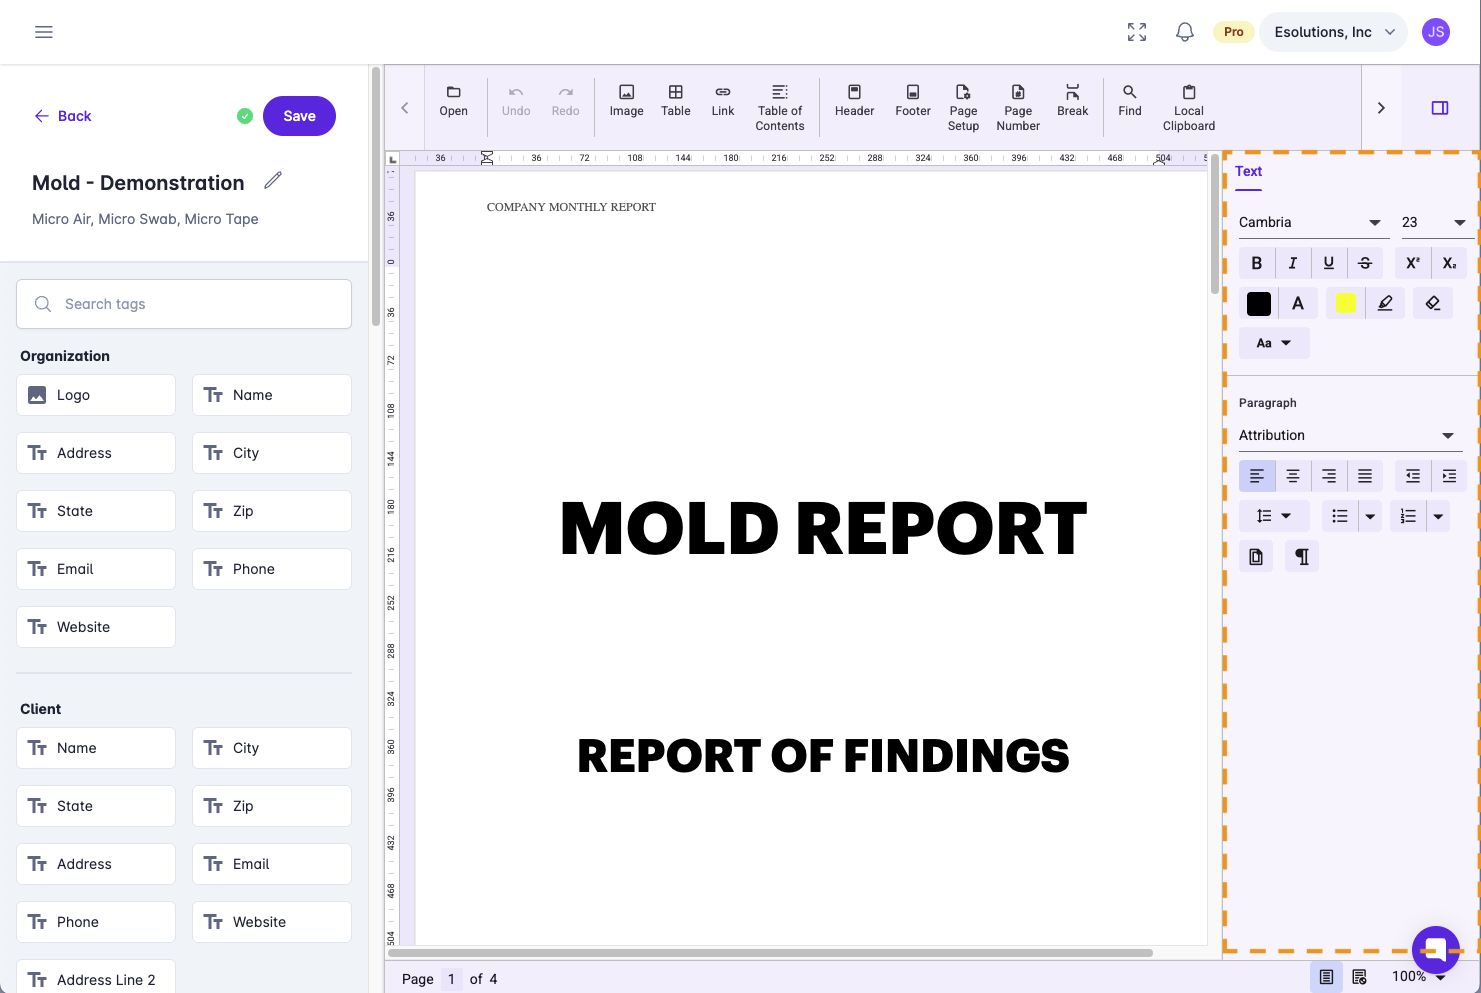
Report tags are on the left. Report tags serve as the building blocks for creating reports that can be easily generated in a consistent format.
Report tags are categorized by subject matter, including Organization, Client, Project, Partner Lab, Overview, Sample, Others, and Documents.
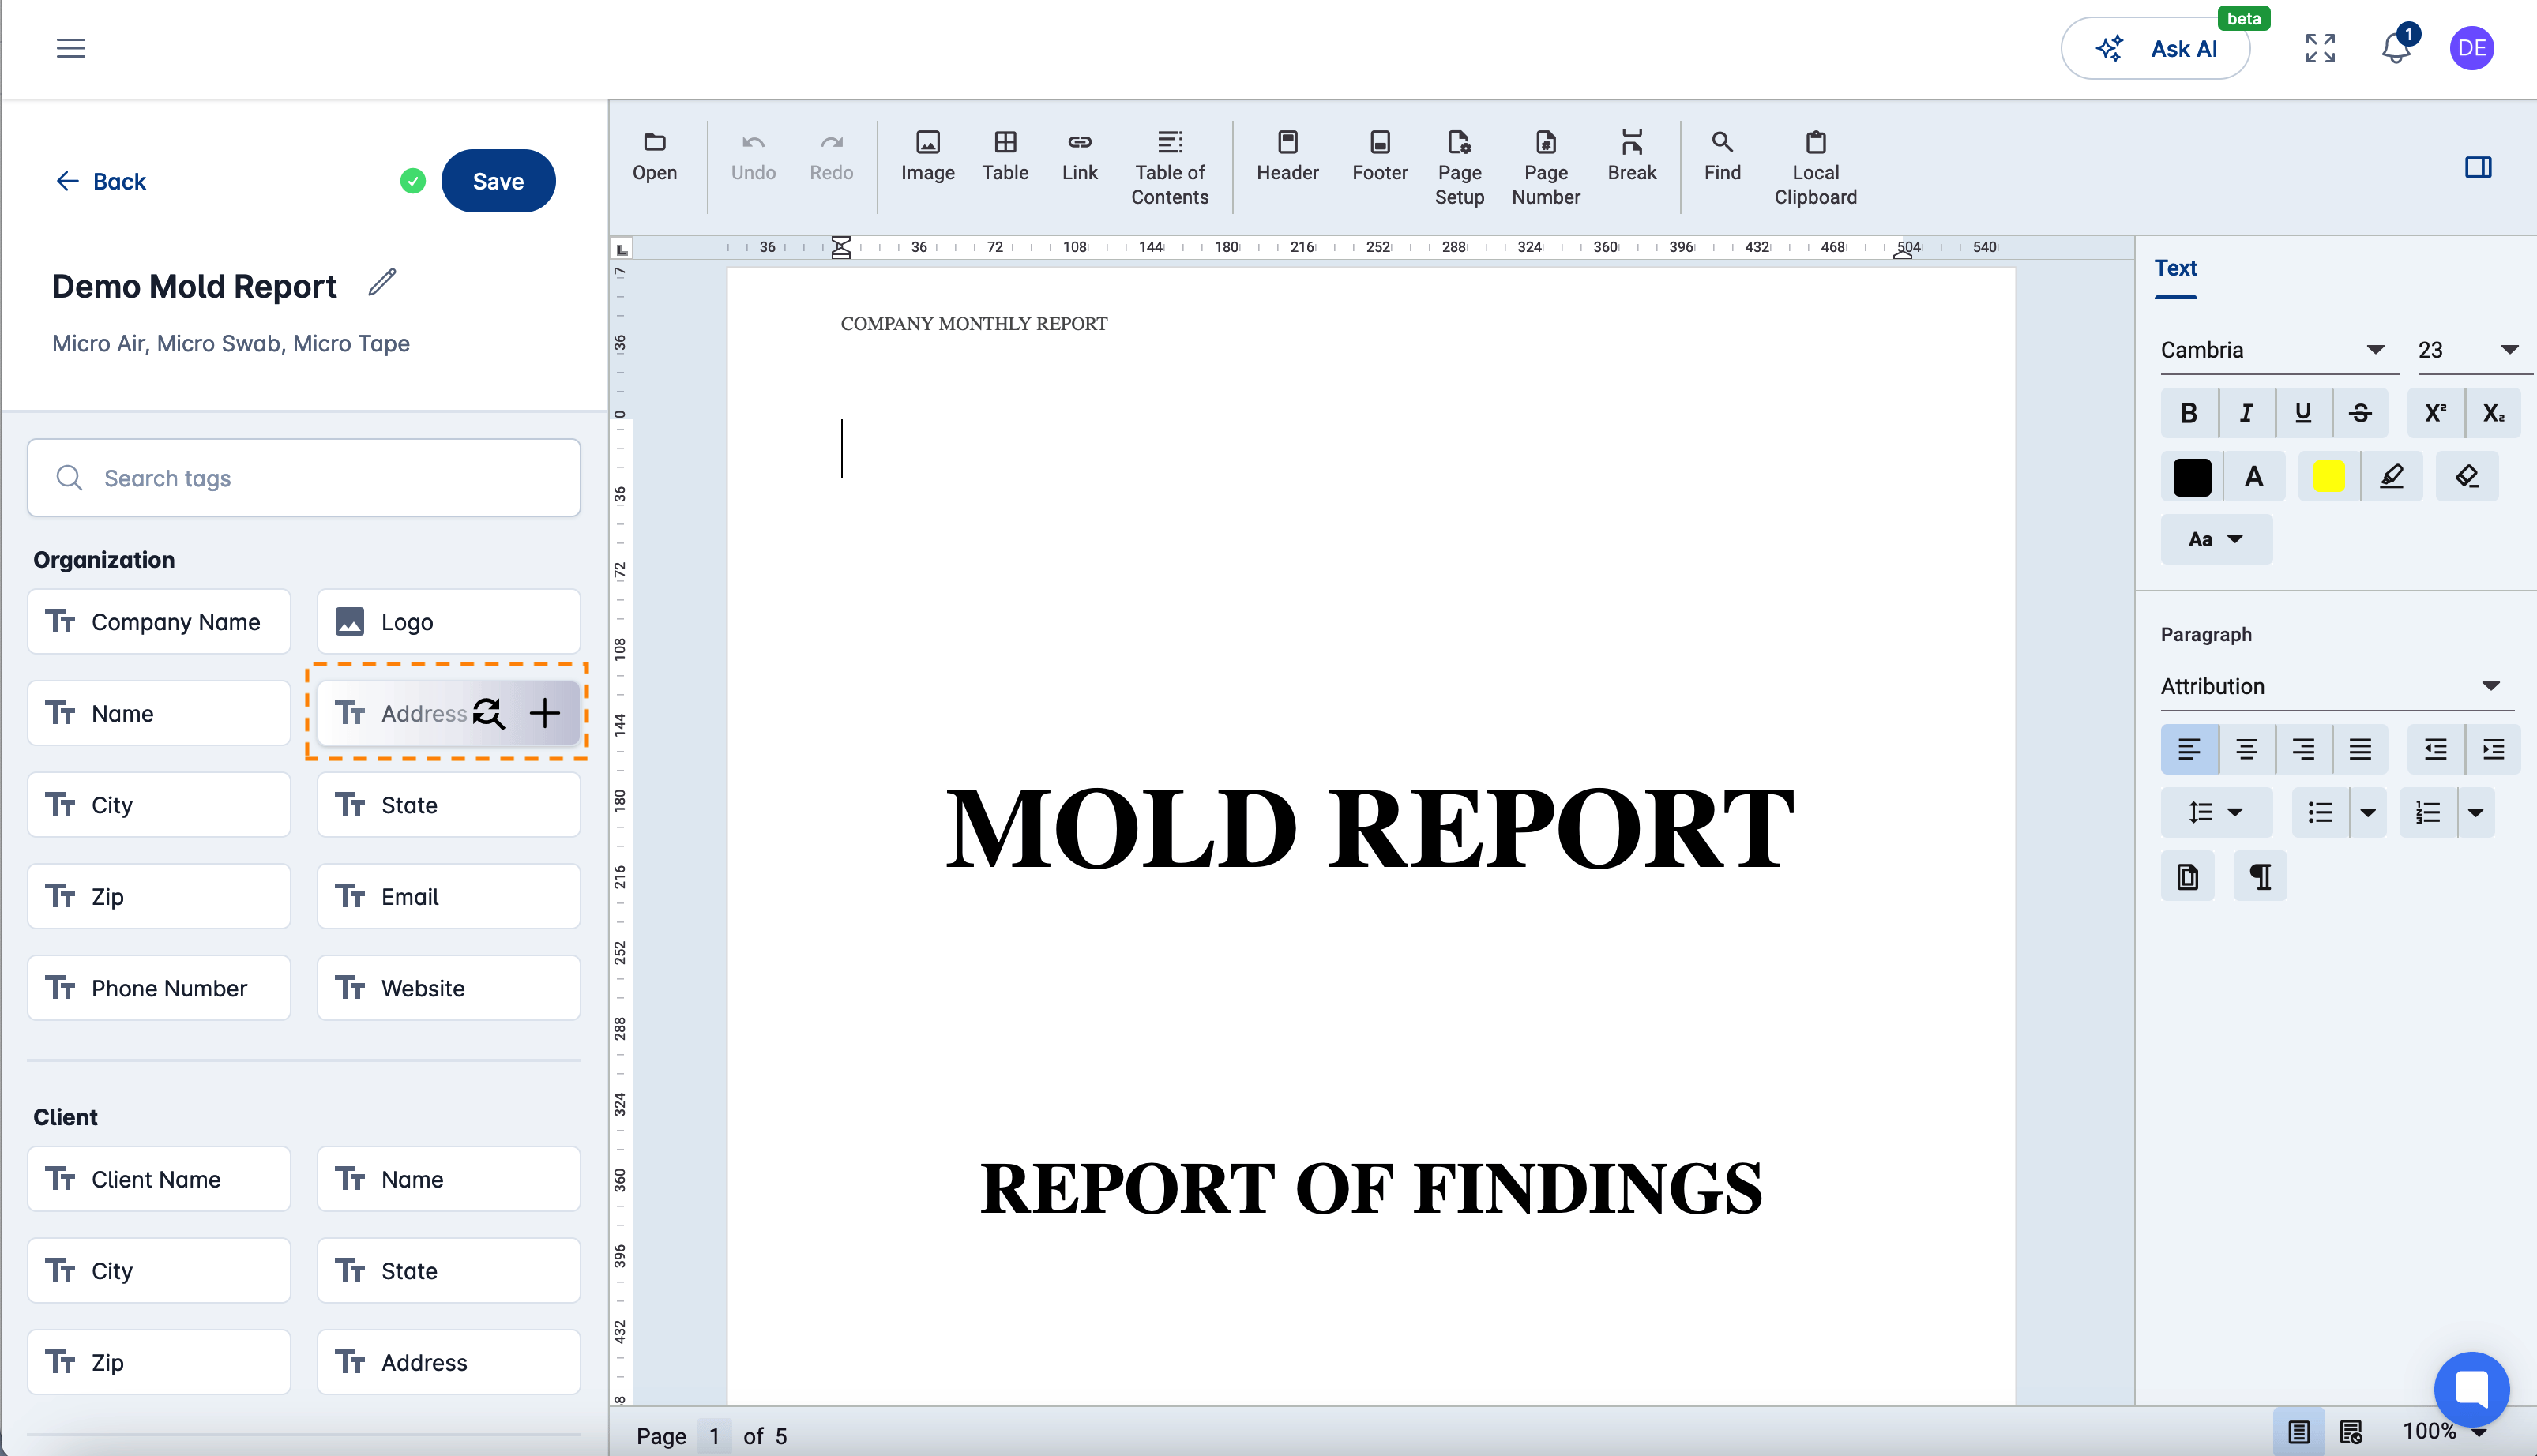
When hovering over a tag, you will notice two icons. There is an icon that has arrows over a magnifying glass. This is the find/replace icon. The other icon is the add icon.
Report Template Find/Replace
The fastest way to tag your document is by using the find and replace method to quickly tag recurring content within your report template. For instance, if you need to replace "100 Main Street" with the inspection site address, start by highlighting the first instance of "100 Main Street". Then, hover over the Site > Address Line 1 tag and click the Find/Replace icon.
This will open a Replace panel on the left side of the editor, with the Find and Replace fields already filled out. To complete the process, simply click Replace to replace a single instance, or Replace All to replace every instance of "100 Main Street".
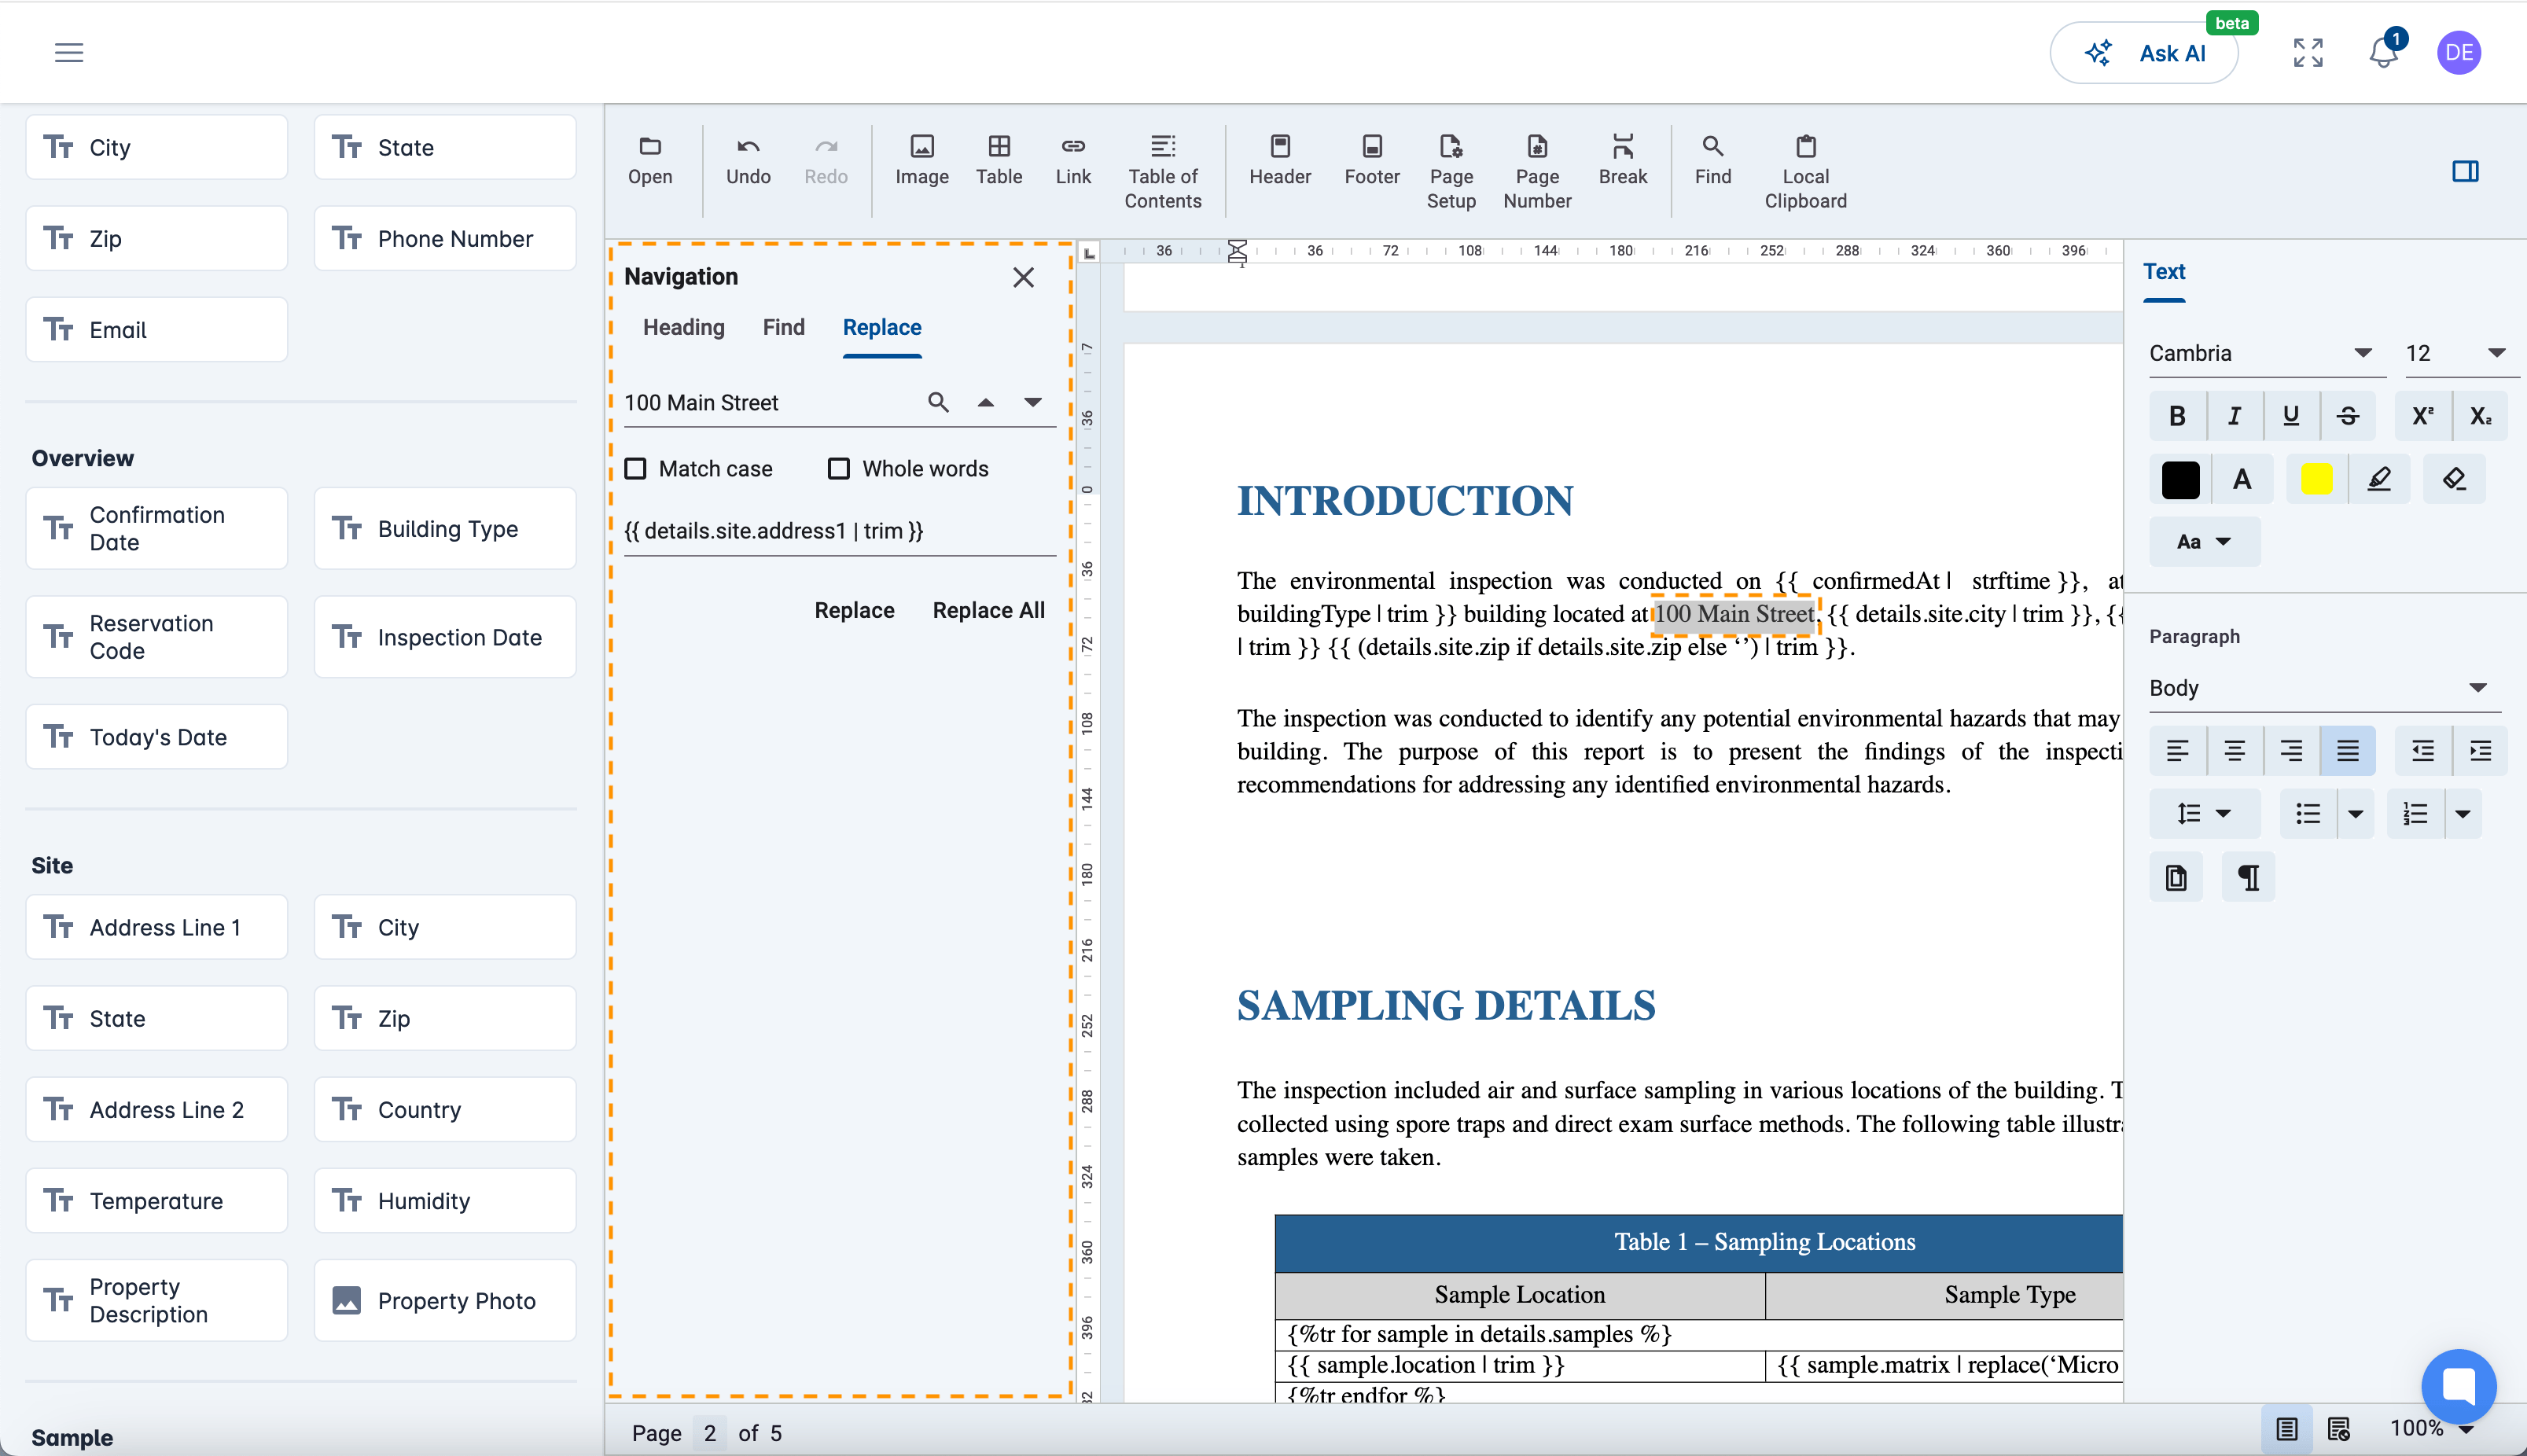
Report Template Replace
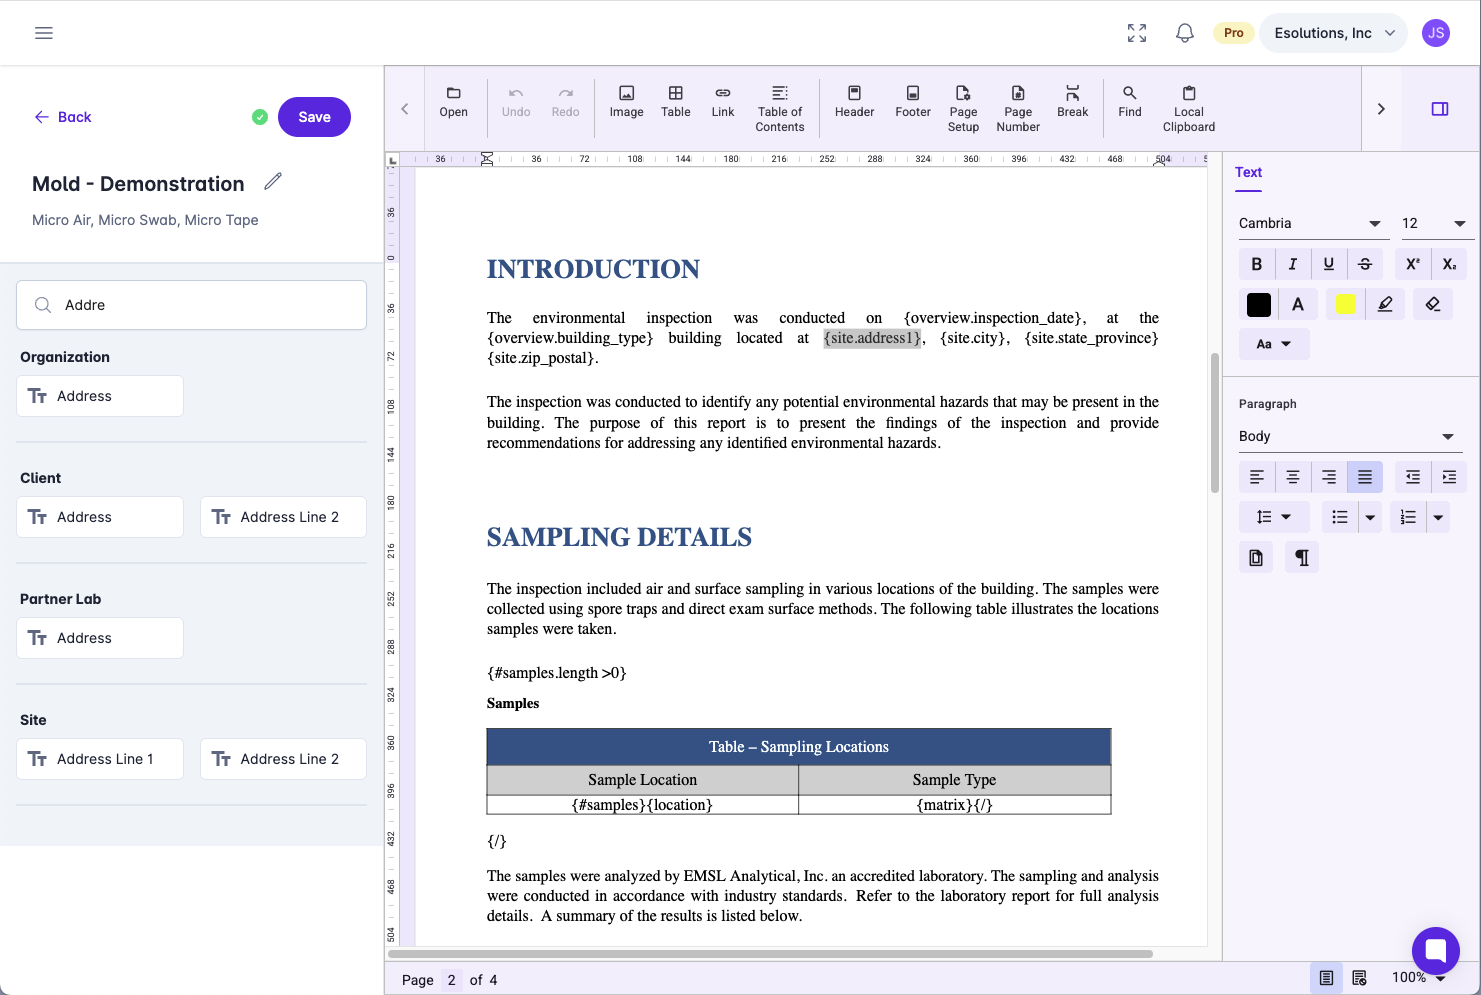
You will notice that tags are enclosed in curly brackets at the beginning and end. This indicates to the system that the tag contains specialized content that needs to be replaced. Tags are highly versatile, capable of handling everything from simple data replacement to conditional document logic.
It's common in a report template to want to display certain text only if a lab order comes back positive or negative. There is a tag for that in the Sample tag section. The tag is labeled Positive/Negative Inspection. If you use this tag in a template you will see the following tag added to your document.
{%p if inspection_status %}
// ADD YOUR TEXT HERE TO SHOW IN THE REPORT IF INSPECTION IS POSITIVE
{%p else %}
// ADD YOUR TEXT HERE TO SHOW IN THE REPORT IF INSPECTION IS NEGATIVE
{%p endif %}
Simply add your conditional text where appropriate.
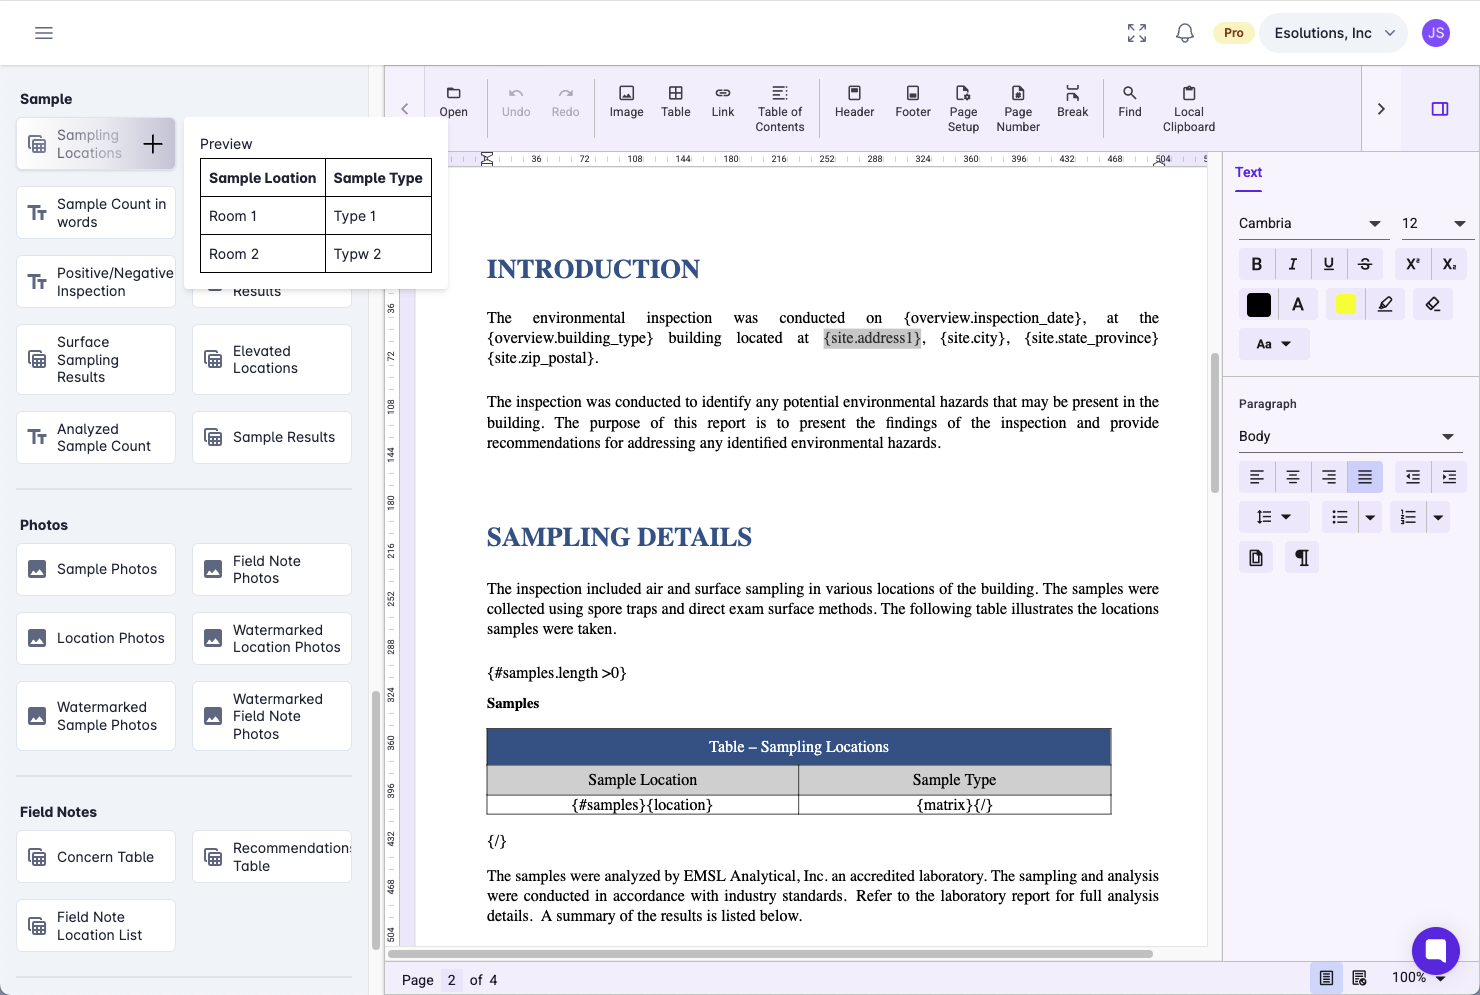
Environmental reports frequently have tables summarizing sample information. If you look at the available tags, in the Sample section you will notice tags with the following icon:

This icon indicates that the tag produces a table when inserted into your document. If you hover over the tag you will see an example (preview) of the table.
When you are satisfied with your template simply click the save button in the left panel. Your template will now be available when generating reports.
